Adjusting the Schedule details
Filtered lists for entity selection
Introduction
ChathamDirect now offers a web-based, five-step workflow for entering fully executed interest rate transactions
Supported Transaction Types
The IR Web Loader currently supports:
Fixed-for-Floating Swap
Floating-for-Fixed Swap
Swap with embedded Floor
Within the above categories, nearly all transactions are supported. If you are encountering difficulty and suspect a transaction is not supported, please reach out to your Chatham representative who will be able to assist you.
Permissions
To access the IR Web Loader, the Access Interest Rate Swap Loader permission found in the Transactions permission section must be enabled:

Menu Location
To navigate to the page, hover over Trading and click IR Web Loader:

Getting Started (first visit)
The landing page for the web loader provides several ways to get started entering your first transaction into ChathamDirect:

After clicking Add New Swap, the trade loading wizard will open to the first of five-steps in the entry process:
 Note: the trade will not be reflected anywhere else in ChathamDirect until the last step is completed and a success message is indicated
Getting Started (experienced)
On subsequent visits to the page, the dashboard will reflect:
- All trades In Process – these transactions were started but were saved and closed before completing the entry process. They are not yet ‘active’ in ChathamDirect and utilize a temporary CRN until finalized
- Loaded Transactions within the 31-day date range – these transactions have successfully been loaded and are ‘active’ in the system
- To view trades uploaded further in the past, the starting point of this date range can be adjusted by using the date picker (to the left of the Add New Swap button):
- To view trades uploaded further in the past, the starting point of this date range can be adjusted by using the date picker (to the left of the Add New Swap button):

Getting started by copying from an existing trade:
This feature enables a trade to be started using the terms of a previously entered transaction. It can be convenient when a large exposure has been hedged with several counterparties or when trades follow similar economic patterns:

After clicking the above icon, details of the existing trade are copied into a new wizard:

- Note: several inputs are deliberately not copied in the process—Internal Reference Number, Counterparty Reference Number, Regulatory fields, and Confirmation file.
Navigating the Wizard
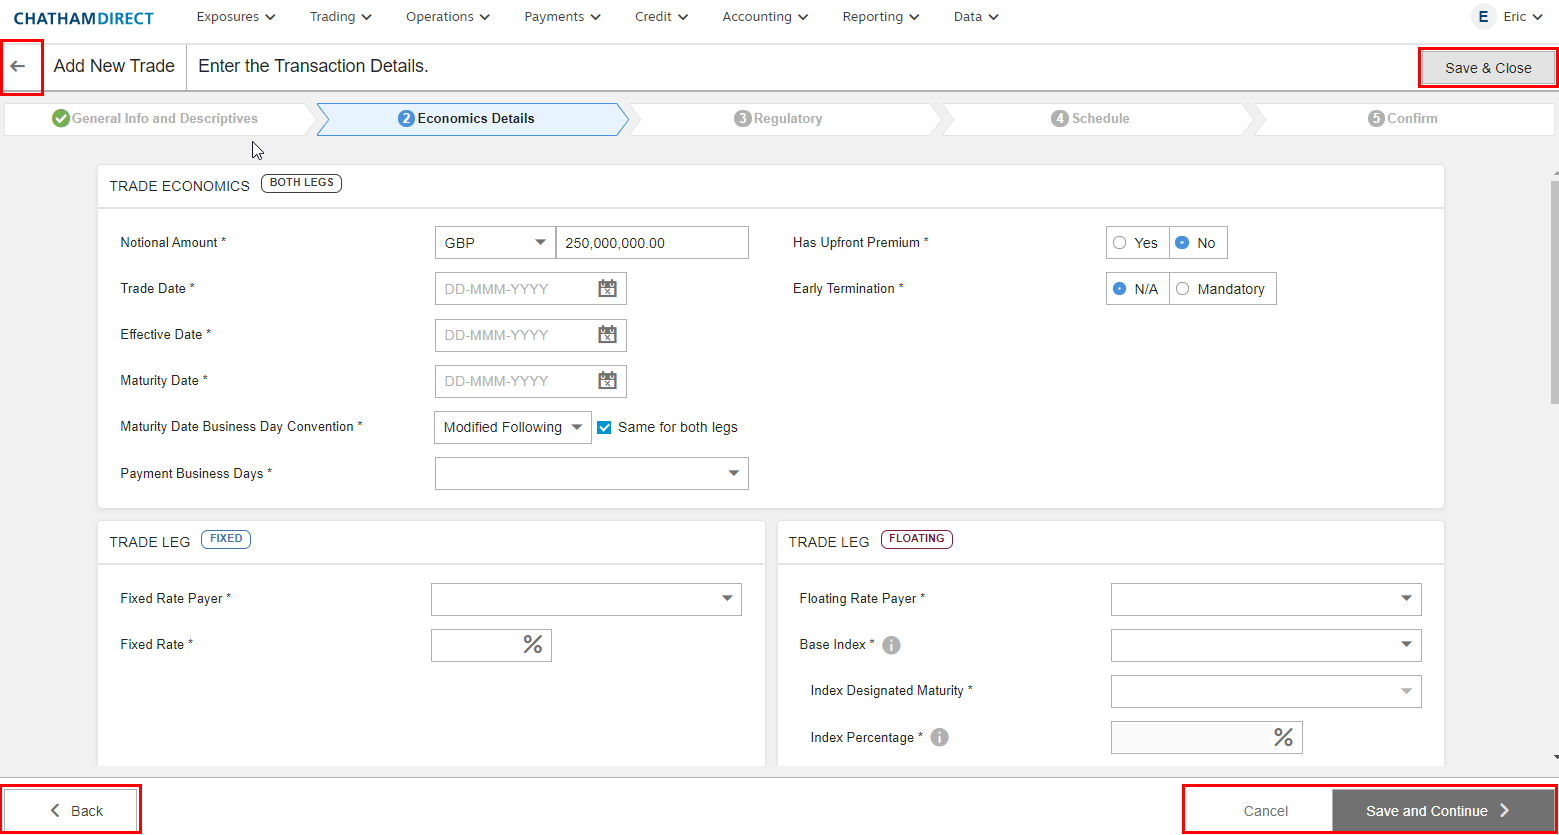
There are many ways to navigate the five-step loading wizard which have been highlighted in red below:
- Five-Step Progress Bar (middle) – All completed steps will show green checkmarks and can be revisited by clicking on them. This can be particularly useful for navigating back and forth between the Schedule step and Economics Details tab
- Save & Close – provides the ability to pause the trade load and return at a later time without losing progress
- Cancel – is a way to exit the wizard and delete this trade. All progress will be permanently lost
- Save and Continue – this button will turn green when all required fields on the step have been entered and there are no validation conflicts (e.g., an effective date after a maturity date). When disabled (dark gray; as shown above), hovering over the button will call attention to the fields which are preventing progress
Adjusting the Schedule details
On step 4, the schedule will be generated from the Economic Details. It is important to verify the accuracy as the schedule is the source of truth for the trade in ChathamDirect:

If the schedule is inaccurate, the preferred path would be to double check the Economics Details on step 2. Making any changes on prior steps will regenerate the schedule and hopefully fix the majority of issues.
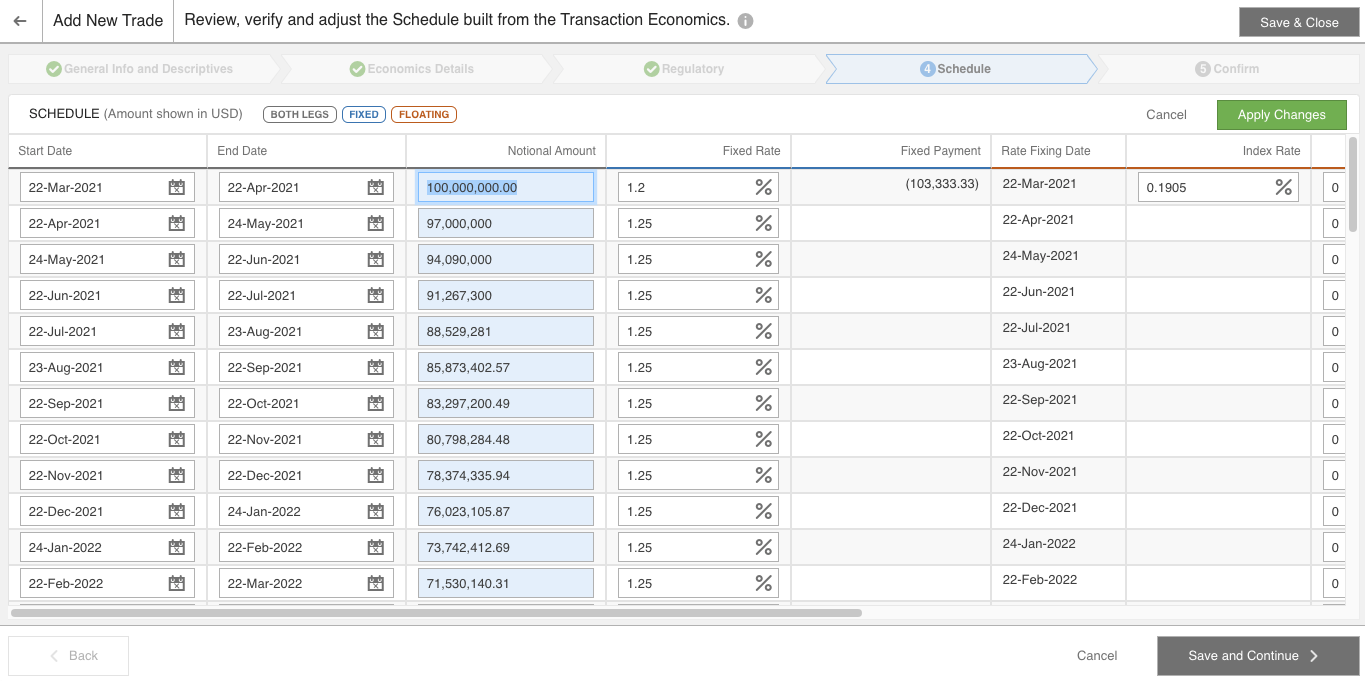
If changes are still required, there is a pencil icon in the top right for editing. Clicking this icon will allow most fields to be modified (with the exception of the Payment fields, Rate Fixing Date, and any Index Rate for which the Fixing Date is in the future):

- Note: once changes have been made, the Apply Changes button will turn green. When ready, click this button to save and recalculate payments if applicable. Canceling will discard any changes made and exit edit mode
Update an entire Schedule column:
Edit mode also supports the copying and pasting of one or multiple data points into a column. If an entire column needs to be changed—perhaps to create an amortizing schedule—it could be:
- Copied by clicking on the column header (as depicted in the screenshot above)
- Manipulated in Excel (or some other application)
- Pasted back into the top cell of the Notional column
The example below follows this pattern, using Excel to create an amortizing notional and paste it back into edit mode:

- Note: all changes made in edit mode are highlighted in blue for reference until they are applied
Filtered lists for entity selection
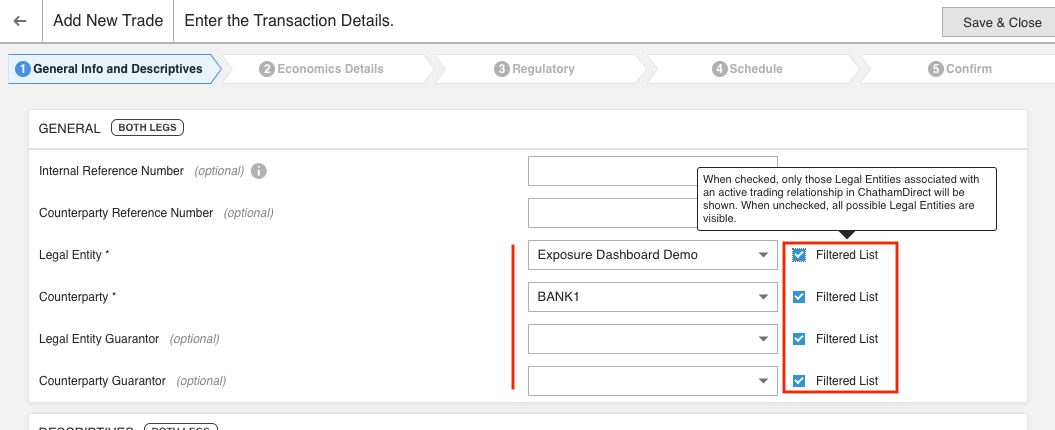
These checkboxes affect the options available in the dropdown lists to the left. When selected, as the checkboxes are by default, the dropdowns include only entities already associated with active trading relationships. When unselected, the dropdown list to the left will include all possible options:

